
What are the features of SCIM for Okta?
What are the prerequisites for setting up SCIM?
How do I configure SCIM for my Okta integration?
What are the features of SCIM for Okta?
-
Push New Users. New users created through Okta will also be created in Blue Ocean Brain
-
Push Profile Updates. Updates made to the user's profile through Okta will be pushed to Blue Ocean Brain.
-
Push User Deactivation. Deactivating the user or disabling the user's access to the application through Okta will deactivate the user in Blue Ocean Brain.
-
Push User Reactivation. Reactivating the user’s access to the application through Okta will reactivate the user in Blue Ocean Brain.
What are the prerequisites for setting up SCIM?
SSO must be fully configured and working before provisioning can be enabled. Please ensure that you and your Blue Ocean Brain IT contact have verified a working SSO setup through Okta before continuing.How do I configure SCIM for my Okta integration?
Please reach out to your Blue Ocean Brain IT contact and request “SCIM” (automatic user provisioning) to be enabled for your account. The Blue Ocean Brain IT contact will generate and provide you with an authentication token, which will be entered into the Okta application.
Step 1: Enable Provisioning in Okta:
-
In Applications, click the Provisioning tab.
- Within the Provisioning tab, on the left side panel, click the Integration tab.
- Click the button, Configure API integration.
-
Check the box for Enable API integration.
-
In the API Token field, enter the authentication token provided by the Blue Ocean Brain IT contact.

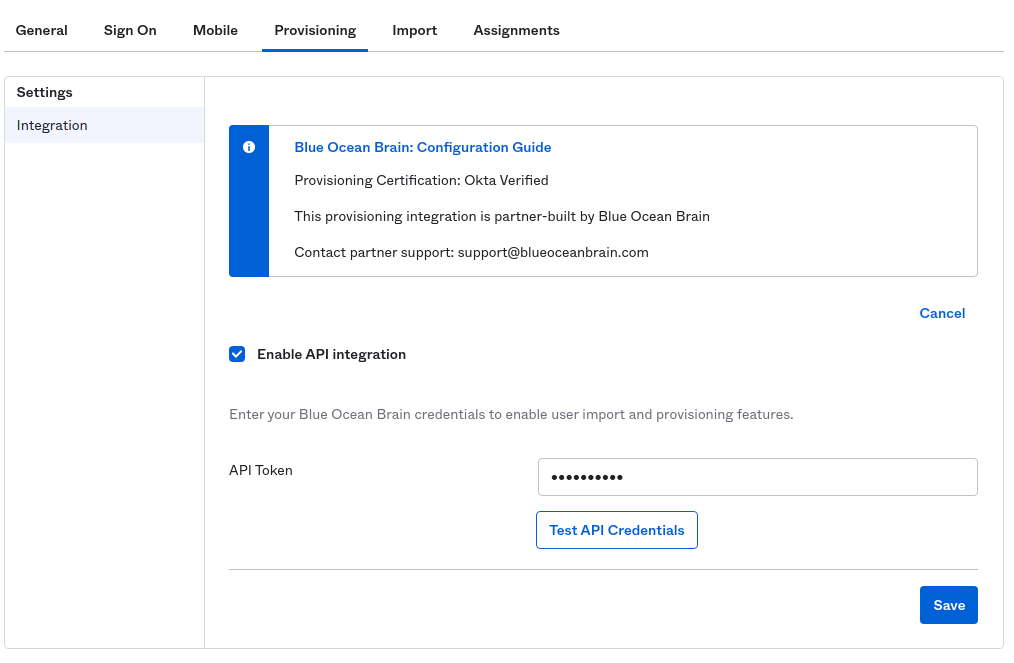
-
Click Test API Credentials. If the API Token was entered correctly, you should receive a successful message. If a failure occurs, reach out to your Blue Ocean Brain IT contact to assist with troubleshooting.


-
Click Save after a successful test.
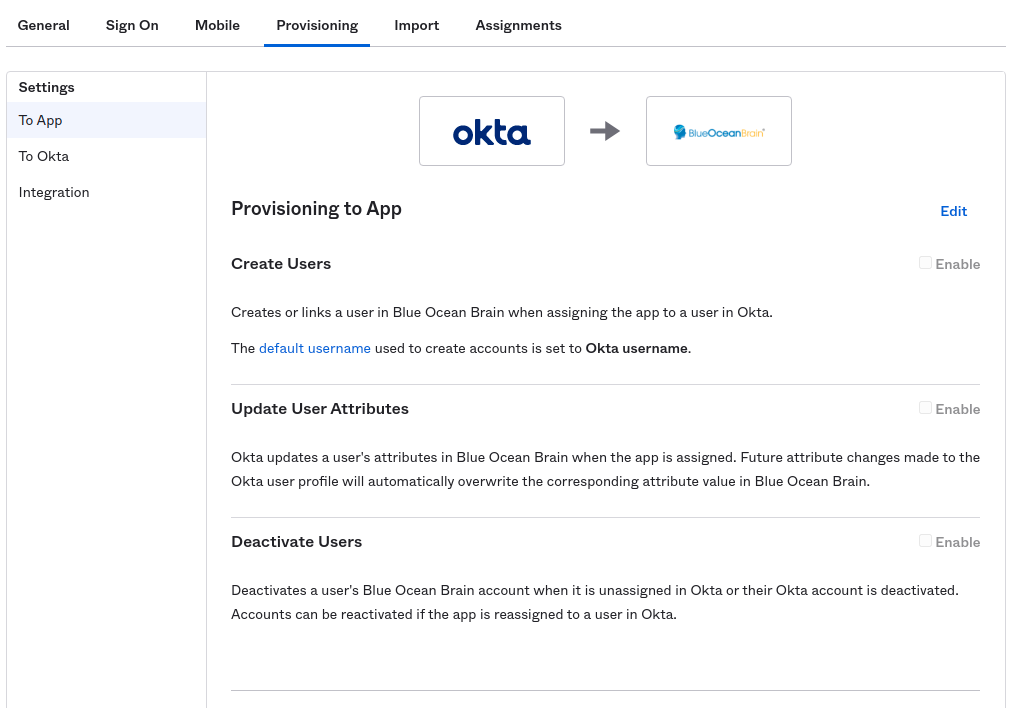
After saving, additional options become available in the Settings area. On the To App tab, enable all three provisioning options: Create Users, Update User Attributes, and Deactivate Users.

Step 2: Configure and map SCIM attributes.
By default, the following attributes are kept in sync with Blue Ocean Brain:
- First Name
- Last Name
- Primary Email
- Username (the Unique Identifier)
- Preferred Language (if your company is using multiple languages and language for a user isn't set, it will default to English)
You may want to add additional attributes for your employees in Blue Ocean Brain for reporting purposes.
Note: If you will configure additional attributes, you will need to send a screenshot of the Display Name and Variable Name of the new attributes to the BOB IT team so that they can be mapped on the BOB end.
-
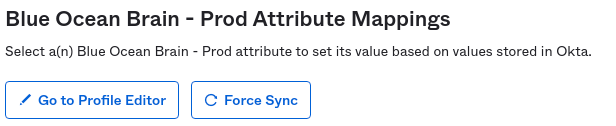
Go to the Provisioning tab in Okta. In the To App tab, click the Go to Profile Editor button

-
The currently mapped attributes are displayed. Click Add Attribute to add an additional attribute.


-
You'll see the Add Attribute pop-up. The values to be entered in this screen depends on which attribute in Okta you’d like to sync with Blue Ocean Brain. Please consult the Common Profile Attributes or Custom Profile Attributes below to determine which values to enter.
-
After all the attributes are added, they then need to be mapped. Click the Mappings button.
-
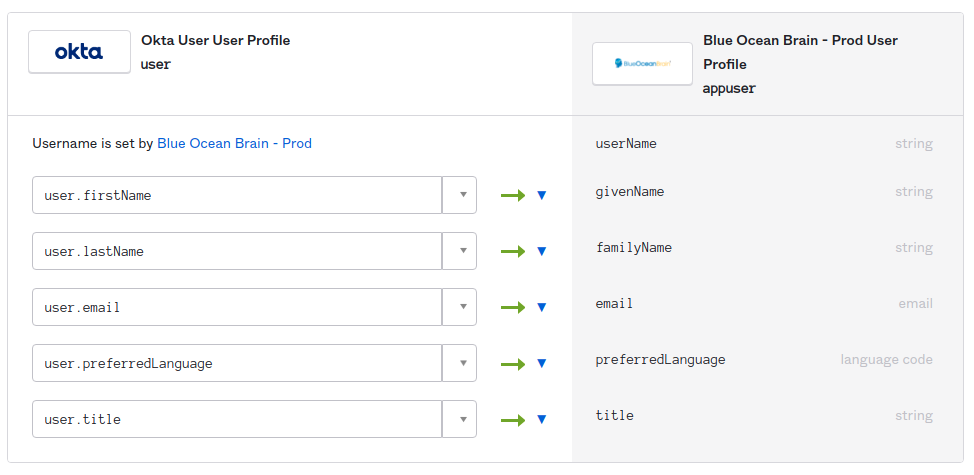
Select the Okta User to Blue Ocean Brain tab at the top.


-
The dropdown in the left column will be blank for all unmapped columns. Locate the Okta attribute in the right “Okta” column that you’d like to map. In the row corresponding to that attribute, select the correct attribute from the dropdown in the left column. As an example, the following screenshot shows the “title” attribute mapped.
-
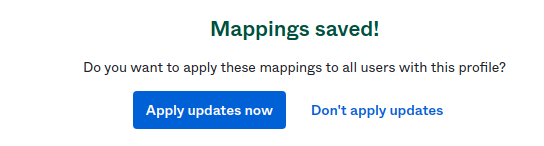
After the mappings are complete, press the Save button at the bottom. You will be presented with the option of when to apply the changes. If unsure which apply option is best for you, select the “Apply updates now” button.
Note: If you add additional attributes to SCIM at a future date after you sync your users, you will need to initiate a re-sync after you add those attributes by clicking "Provision user" in the Provisioning tab.
Step 2A: Common Profile Attributes
Data Type is always “String”. The min and max values are optional.
External Namespace Legend:
-
<Core> = urn:ietf:params:scim:schemas:core:2.0:User
-
<Enterprise> = urn:ietf:params:scim:schemas:extension:enterprise:2.0:User
|
Display Name |
Variable name |
External Name |
External namespace |
User Personal |
|---|---|---|---|---|
|
Employee Number |
employeeNumber |
employeeNumber |
<Enterprise> |
Yes |
|
Cost Center |
costCenter |
costCenter |
<Enterprise> |
No |
|
Organization |
organization |
organization |
<Enterprise> |
No |
|
Division |
division |
division |
<Enterprise> |
No |
|
Department |
department |
department |
<Enterprise> |
No |
|
Manager Value |
managerValue |
manager.value |
<Enterprise> |
Yes |
|
Manager display name |
managerDisplayName |
manager.displayName |
<Enterprise> |
Yes |
|
Title |
title |
title |
<Core> |
Yes |
|
Street address |
streetAddress |
addresses.^[primary==true].streetAddress |
<Core> |
Yes |
|
Locality |
locality |
addresses.^[primary==true].locality |
<Core> |
Yes |
|
Region |
region |
addresses.^[primary==true].region |
<Core> |
Yes |
|
Postal Code |
postalCode |
addresses.^[primary==true].postalCode |
<Core> |
Yes |
|
Country code |
country |
addresses.^[primary==true].country |
<Core> |
Yes |
I've finished adding my attributes and will now map my attributes
Step 2B: Custom Profile Attributes
If an attribute is not listed above, it’s considered a custom attribute. Custom attributes can also be kept in sync with Blue Ocean Brain but require slightly more coordination with your Blue Ocean Brain IT contact. Please inform your Blue Ocean Brain IT contact that you’d like to sync one or more custom attributes and one or more “meta fields” will be assigned to you.
|
Field |
Description |
|---|---|
|
Type |
Very often will be “String”, but can be any value based on the documentation provided by Okta. |
|
Display Name |
A very short (often a single word) description of the attribute, this value can be whatever you’d like. |
|
Variable Name |
Corresponds to the name of the variable stored in Okta. This value will be dependent on which attribute you’d like to add. |
|
External Name |
meta#, where # is a numeric value assigned to you by your Blue Ocean Brain IT contact. If meta field 5 is assigned to you, then this value should be “meta5”. |
|
External namespace |
All custom variables have the namespace of “urn:bob:params:scim:schemas:extension:meta:2.0:User” |
|
User Personal |
Value depends on the attribute. If unsure, it’s recommended to check this box. |
Once your attributes are mapped, move to Step 3.
Step 3: Establish user assignments.
-
Click the Assignments tab. You'll see red notice markers next to user accounts who are currently assigned to the Okta SSO profile. This indicates that users are un-synced via SCIM; users assigned to the application prior to enabling provisioning will need to be “synced”.
**Note: If you don't want all users with an SSO profile to be added to Blue Ocean Brain, please make sure to set up a user group of people who will be assigned to Blue Ocean Brain.


-
To sync the un-synced users, click the Provision user button. The “sync” job runs in the background. Once complete, refresh the page and the red notice indicators around the user should disappear.
-
From this point forward, Okta will automatically sync any users you assign or un-assign to the application in Okta. The Provision user button is not needed on an ongoing basis.
Note: BOB supports User assignments, not Group assignments in Okta.
Troubleshooting and Tips
- Okta limits the API rate; see more information here: API Rate Limits
-
By default, Blue Ocean Brain will send a welcome email to the new user on account creation. If you’d prefer these welcome emails not to be sent, please contact your Blue Ocean Brain Client Success Manager or Blue Ocean Brain IT contact.
-
In order to be supported by provisioning, a user must have a First Name and Last Name, as well as a unique email address.
-
The "Preferred Language" field is optional. If set, the field should be an “ISO 639-1” language code. If your Blue Ocean Brain account doesn’t support the selected language, English is selected for the user. Contact Blue Ocean Brain Support to inquire about enabling additional languages.
- If you experience errors with provisioning learners via SCIM after the client launch of learners via employee file, you may need to de-provision the learners first and then re-provision them.